Wall thickness is one of the most overlooked and problematic dimensions when doing CNC design or machining evaluations. What looks like a distance between two parallel lines on a drawing can affect material forces, heat transfer, clamping methods, tool deflection, and final assembly accuracy once it hits the cutting edge. In our daily machining at JeekRapid, much of the “unexpected dimensional drift” is ultimately related to wall thickness, not the machining parameters themselves.
The following is not a textbook description, but rather a summary of shop floor and machine tool experience for designers, processors, and production engineers.
What Wall Thickness Really Means in CNC Machining
In the CNC environment, “wall thickness” is not an absolute value, but a state of construction. The same 2 mm wall thickness that may be stable on an aluminum part may jump around on a 304 stainless steel part; the same 10 mm wall thickness with a wall height of more than 60-80 mm will magnify the heat, backlash, and tool deflection more than expected. In other words, wall thickness itself is not the problem; it’s the whole combination of wall thickness and material, wall height, machining path, and tool rigidity that determines whether or not the part will be machined safely.
When engineers look at wall thickness, they usually start by asking three questions. First, is the wall thick enough to resist machining side forces? If the wall is too thin, it will deform elastically like shrapnel under milling lateral forces, with the tool being pushed out of alignment and the wall springing back, ultimately resulting in less reliable dimensions and shape. Second, does wall thickness release internal stresses in the material after roughing? Thick wall retains more material, residual stress is also more, once a large area of one side is cut off, the remaining wall will slowly move in a few hours, which is the reason why many parts “change size overnight”. Thirdly, will the wall thickness store heat and produce secondary deformation after cooling? Deep cavities and thick walls can keep the heat inside, measured on the machine tool is not a problem, just a temporary thermal expansion state, when completely cooled down the deep contraction than the upper part, the size of the natural run in.
Bigger walls don’t mean safer. For CNC, it is sometimes more difficult to control “too thick” than “too thin”: thin walls are hard to handle during machining, while thick walls give you a “kick in the pants” during the cooling and resting phases.
Why wall thickness affects machining stability
In the actual cutting of machine tools, wall thickness affects stability in two main dimensions: the mode of force transfer and the mode of heat transfer.
Force transfer
A thin wall absorbs some of the lateral force and reduces tool bounce, but at the cost of the wall being pushed out of the way during the cut, the tool is in a “false position”, and the wall bounces back after clamping, and the actual dimensions are skewed. Thick wall is like a hard beam, almost do not let the tool squeeze, all the lateral loads are pushed back to the tip, especially in the deep cavity area, the tool in the bottom of the counterforce is much greater than the top. The result is that the tool in the depth of the lateral offset, the upper and lower cross-section appears different taper, the wall of the light band is inconsistent, and the overall slight deformation of the clamping may also occur after the loosening of the overall deformation.
heat transfer
thick wall heat storage speed, slow heat dissipation, roughing temperature continues to rise, and so into the finishing deep still in the high temperature zone. Measured on the machine tool is the “size after thermal expansion”, the workpiece leaves the machine tool, natural cooling, the deeper contraction more than the surface, there will be a cooling shrinkage than the measured value of the smaller, the top and the bottom because of the temperature difference between the size of the difference between the wall in the process of static slowly bending and other phenomena. Between multiple cuts, if the temperature of the cavity is different at each section of the cut, it will eventually superimpose into a taper or localized deformation that is not visible to the naked eye, and we see similar situations on deep-cavity aluminum parts almost every day.
Stabilized wall thickness intervals for different materials
The following numbers are not textbook, but are approximate ranges that we have verified over and over again on actual batch parts.
Aluminum (6061 / 7075)
In aluminum, thin wall thicknesses of 0.5-0.8 mm are manageable in small sizes, but once the wall heights are elongated, it is best to stay in the range of 1.0-1.5 mm for both rigidity and weight reduction. When the wall thickness reaches 6-15 mm, and fits deep cavities of 60-80 mm or more, special attention should be paid to the cooling and stress relief after rough machining, otherwise the secondary shrinkage after cooling will turn the originally qualified cavity into a small one.
Stainless Steel (304 / 316 / 17-4PH)
Stabilizable thin walls of stainless steel usually start at 1.0-1.2 mm, any thinner than that and it is difficult to withstand the strong lateral forces in a deep groove. Regular wall thicknesses are designed in the 1.5-2.5 mm range, while thicker walls can easily exceed 5-20 mm. In such constructions, the biggest problem is not so much stiffness, but rather reverse thrust and tool deflection, which is amplified by even a few tens of micrometers of tool deflection in the deeper regions at the height of the long wall.
Stainless Steel (304 / 316 / 17-4PH)
Stabilizable thin walls of stainless steel usually start at 1.0-1.2 mm, any thinner and it is very difficult to withstand strong lateral forces in deep grooves. Regular wall thicknesses are designed in the 1.5-2.5 mm range, while thicker walls can easily exceed 5-20 mm. In such constructions, the biggest problem is not so much stiffness, but rather reverse thrust and tool deflection, which is amplified by even a few tens of micrometers of tool deflection in the deeper regions at the height of the long wall.
Brass (C3604 / H59)
brass cuts very smoothly and thin walls to 0.5 mm are not uncommon, but consider that very thin sections are prone to crimping and localized indentations. In most constructions we would place the stabilized wall thickness at 0.8-1.2 mm, which maintains a good appearance and does not cause deformation due to localized stress concentrations. For thick walls in the 4-10 mm range, the main concern is surface quality and process heat rather than strength.
Engineering Plastics (ABS / PC / POM / PA66)
Theoretically, very thin walls of 0.3-0.5 mm can be achieved with engineering plastics, but that is more for low load, one-off or non-precision parts. In practice, we usually recommend 1.0-1.5 mm as a stable wall thickness for parts that require long-term assembly, holes, and clips. For plastics, the biggest problem is thermal expansion and contraction and delayed deformation, the tool lateral force is not the main contradiction, so the temperature control and cooling time affects the final result more than “whether the knife is sharp enough”.
Thick-walled structure why after machining will “slowly move”.
In the engineering field, the typical characteristics of thick-walled parts is not “processing when moving”, but look at the processing is very good, put a period of time after their own slow movement. Material in the rolling, forging, heat treatment and machining before, has been with residual stress into the workshop; rough machining if the material from one side of a large area to remove, the original balance of the stress field is broken, the remaining thick wall will be in a few hours or even overnight quietly move position.
This movement is often superimposed on uneven temperature recovery in the deep cavity: the deep part is still hot at the end of the roughing process, the upper part has already started to cool down, and by the time the whole part is completely back to room temperature, areas with different amounts of shrinkage will be “pulling” on each other, resulting in a slight bending or ellipticization. If the deburring method is clearly unilateral thinning, with one side fully released and the other still constrained by the thick wall and ribbing, this asymmetric release will produce a deformation of the part that is hard to see with the naked eye, but certainly visible to the gauge. We have done 10 mm wall thickness, 90 mm deep 6061 aviation cavity, the machine tool measurement is completely normal, three hours after the wall inward bending 0.03 mm, and finally can only through the “rough → static → semi-fine → static → finishing” to suppress this trend. 5.
Engineers in the design of wall thickness should pay attention to what
(1) thick vs thin, not the thicker the better, not the thinner the lighter
From the strength point of view, of course, thicker walls are safer, but from the point of view of processing and dimensional stability, the thicker the more likely to be trapped in the heat, trapped stress, the greater the risk of secondary deformation after cooling. Too thin wall in the processing will be pushed by the tool to run around, too thick wall in the finishing process may be “their own slow movement”, the real reliable design is to find a balance between the two strength and machinability.
(2) Wall thickness should take into account the wall height
The same 1.5 mm wall, in the 20 mm wall height is basically not a problem, in the 80-100 mm deep cavity behavior is completely different. The higher the wall height, the longer the force transfer path, the more likely that the tool deflection at the bottom will be magnified, and at the same time the temperature in the deeper part will be more difficult to reduce, so any discussion on the “minimum wall thickness” must be accompanied by a specification of the corresponding range of wall heights.
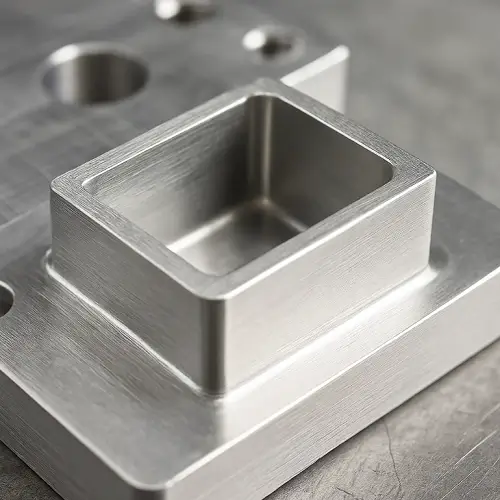
(3) Transition zones need rounded corners
Sharp corners or sharp steps at wall thickness changes can easily create stress concentration points, which are often the first to crack, bend or locally distort after rough machining and thermal cycling. Simple internal rounded corners and smooth thickness transitions can significantly reduce this risk, allowing the wall to deform in a smoother manner during stress and thermal contraction, rather than “bending” at a single point.
(4) Maintain wall thickness continuity
If the wall thickness varies frequently within a part, the rigidity distribution will be extremely uneven: some areas are as hard as a beam, some areas are as soft as a slice, and the lateral force and vibration state of the tool as it passes through will be constantly changing. The result is that the tool is pushed out of alignment in the hard areas and pushes the wall out of alignment in the soft areas, resulting in unpredictable dimensional drift. Designing to keep the wall thickness as continuous or slow as possible is a key to making the overall part behavior more “predictable” during machining.
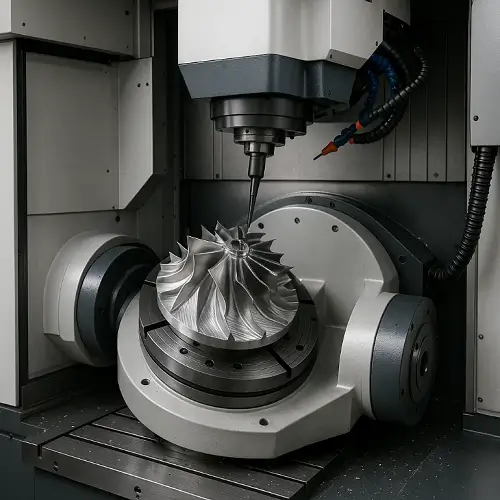
Thick-Wall Machining Strategies
Roughing
The roughing phase is best accomplished by using segmented depths of cut, splitting large cuts into several layers to avoid excessive heat and lateral stress buildup in the bottom of the deep cavity at one time. During the machining process, the cooling rhythm should be controlled, so that the tool is not smothered in the deep groove for a long time to cut continuously, so that the material has time to dissipate the heat. At this time, you can deliberately leave a little more margin, subsequent semi-finishing and finishing and then slowly “repair shape”, rather than counting on roughing once in place.
Semi-finishing
The core of semi-finishing is “correcting” and “stabilizing”, try to change to shorter tools, with higher rigidity to offset the deviation left in the roughing stage. The toolpath should be planned so that the cutting force is distributed as evenly as possible over the entire wall, avoiding localized over-eating of the tool and localized almost non-cutting, which leads to another imbalance of stresses. This stage is equivalent to pulling back a portion of the deformation tendency caused by roughing first, creating a relatively neutral geometric base for final finishing.
FINISHING
Finishing should be done with deliberately low radial loads, so that the tool is more “scraping clean” than continuing to push hard against the wall, otherwise all the stress control that has been done previously will be destroyed. In the case of deep cavities or thick walled parts, use cold air or directional cooling, if necessary, to lock the temperature in a stable range and avoid localized overheating that can cause dimensional drift in the last few cuts. At this point, use the most rigid tool and the smoothest sealing path to keep consistent forces and finish across the entire wall from top to bottom.
Engineers often use a phrase to summarize: roughing to see how fast the material falls off, finishing to see whether the knife has been pushed off by the wall. The former pursuit of efficiency and heat control, the latter pursuit of geometric stability and surface quality, two sets of ideas can not be mixed together.
Wall thickness of the engineering formula
Cylindrical parts commonly used formula:
Wall Thickness = OD – ID/ 2
Geometrically this is only half of the difference between the outer diameter and inner diameter, but in engineering, we are more concerned about: this section of the wall thickness can withstand the lateral cutting forces in the process, in the high temperature and cooling process does not occur in the uncontrolled shrinkage, in the residual stress release still retain sufficient structural rigidity. In other words, for CNC, wall thickness is essentially the “minimum continuous structural width that maintains the shape throughout the machining and service life” rather than an abstract geometric parameter.
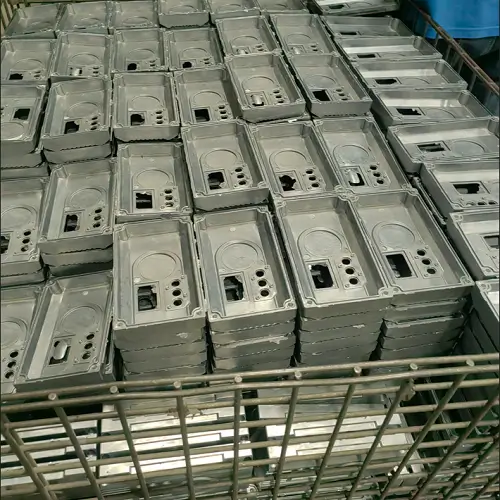
JeekRapid Real-World Example
For a communications housing project, the material was 6061 and the design called for a wall thickness of 10 mm and a cavity depth of 85 mm. The drawing tolerances were not extreme, but the customer specified that the difference between the top and bottom port dimensions had to be kept within 0.015 mm. During the first machining, all the problems appeared after cooling: the workpiece looked normal when it was removed from the machine, but when measured after it had cooled down completely, the roundness deviation was about 0.03 mm, the bottom dimension was smaller than the top dimension by almost 0.02 mm, and the wall was slightly inwardly contracting after the fixture had been released.
These phenomena are very common in deep-cavity aluminum parts, and are especially exposed during the summer months or when the temperature of the machine case fluctuates greatly. We then adjusted the process: changing to a three-stage roughing process with intermediate stoppages to allow the material to release stresses on its own; retracing critical wall surfaces with a short-edged tool in the semi-finishing stage to pull back the imbalance caused by the roughing; and enabling cold air to stabilize the cavity temperature and significantly reduce radial loads during the finishing process. After this process optimization, the difference between the top and bottom dimensions of the finished product was stabilized at 0.007-0.009 mm, and the subsequent assembly test passed once.